Archive for April, 2018

How to install  Ubuntu 18.04 LTS (Bionic Beaver)

Installation steps for Ubuntu 18.04, code named Bionic Beaver. This steps are for the desktop version.

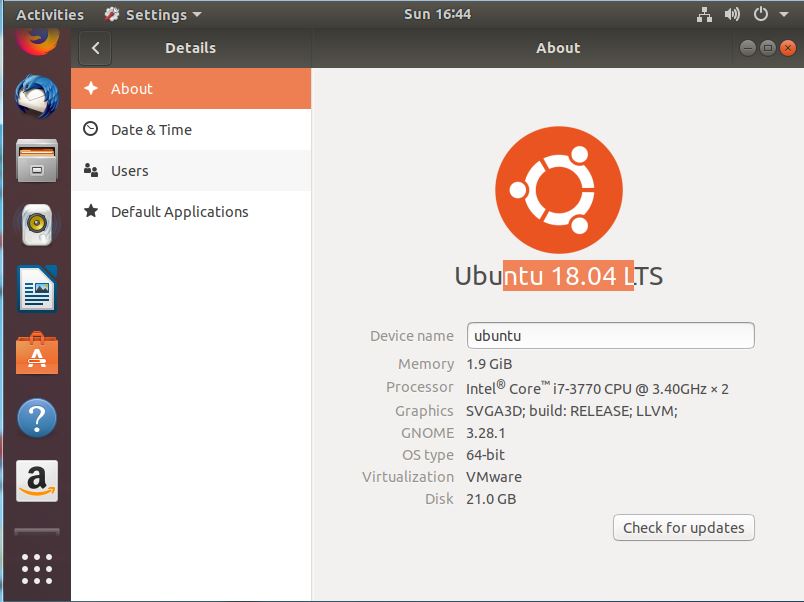
One notable change is Unity is no longer the default desktop environment for Ubuntu anymore. It will feature the latest GNOME (i.e., version 3.28).  The Linux kernel version on Ubuntu 18.04 is 4.15.

1. Download iso  from the sitehttp://releases.ubuntu.com/18.04/
Desktop image (AMD64) – http://releases.ubuntu.com/18.04/ubuntu-18.04-desktop-amd64.iso
Server image (AMD64) – http://releases.ubuntu.com/18.04/ubuntu-18.04-live-server-amd64.iso

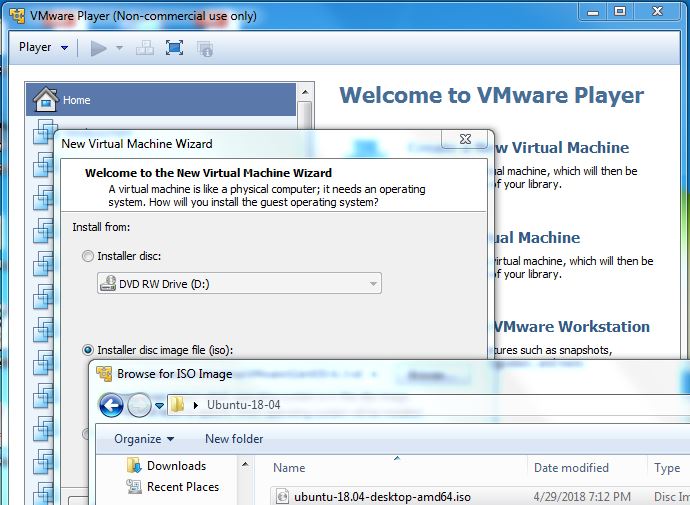
2. Select disc image file (iso) during installation

In my case, I am using VMware player, I select disc image file (iso) during the creation of the VM.

createvm

3. Personalize Linux

In this step, it will ask you for your full name, username, password and to confirm your password.

4. For VMware player, make sure to  customize hardware, select the memory size to allocate (2GB in my case, minimum requirement is 1G), disk size, number of vCPUs etc.

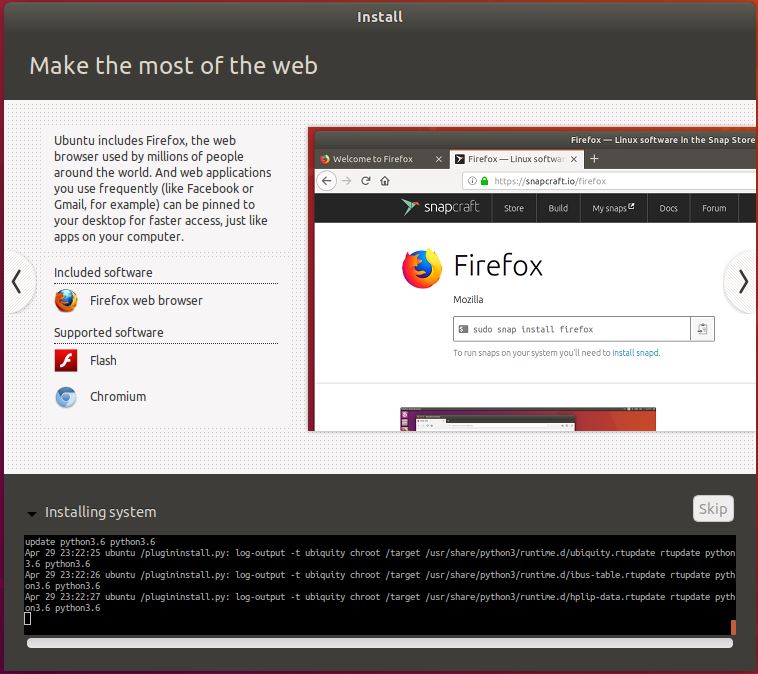
Right after finishing the hardware customization and click start, it will immediately start creating the file system and installing software.

Once completed, the system will reboot.

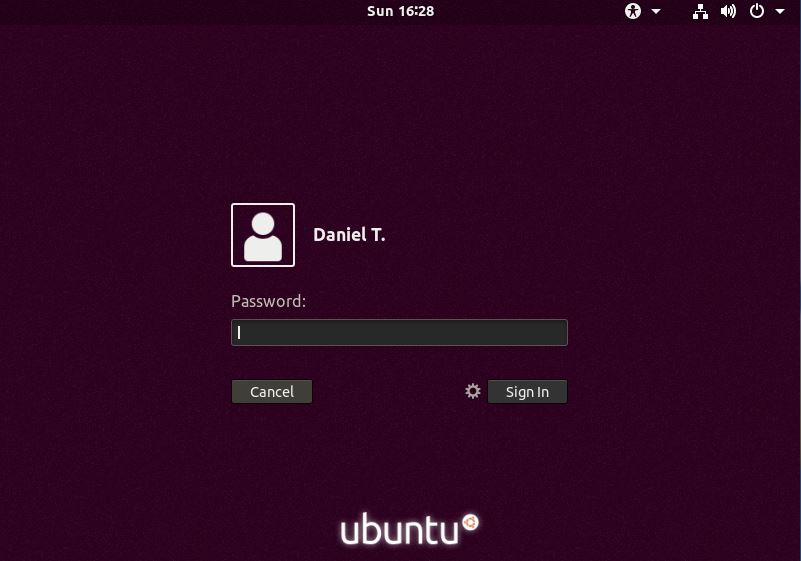
5. Login screen – enter the username and password you submitted when installing the iso.

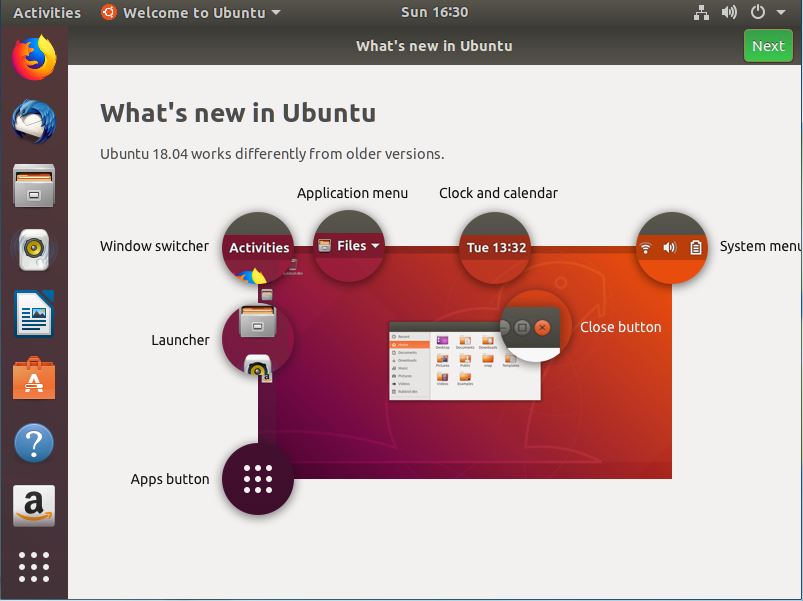
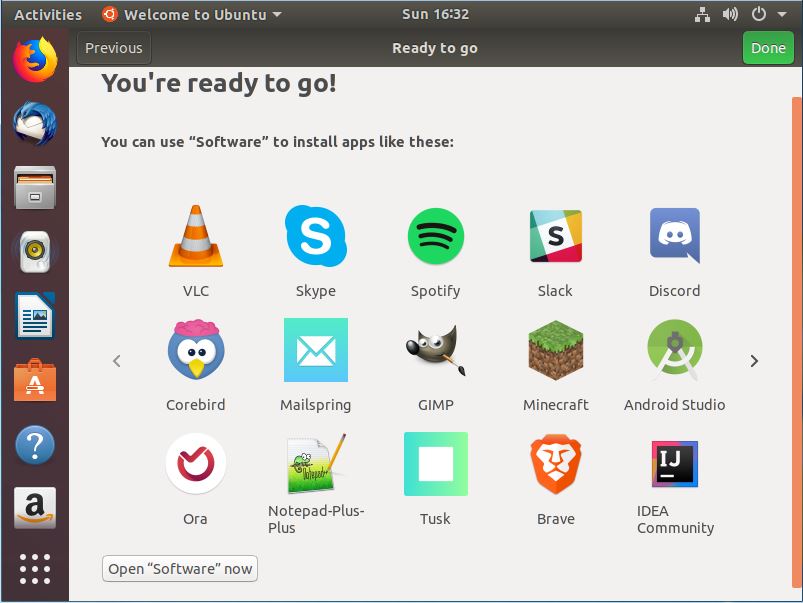
6. What is new screen

7. Start testing some of the applications

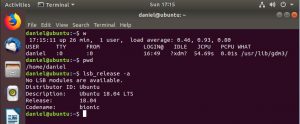
a. The command terminal


b. Firefox browser


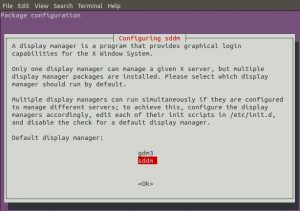
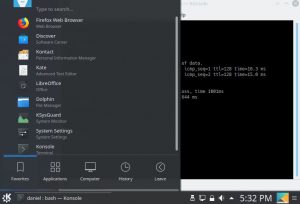
By default Ubuntu 18.04 comes with Gnome 3, you can install KDE plasma and use that as your windows manager. Here are the steps –

1. Run the following commands from the terminal to install kde plasma

sudo apt-get update
apt-get install tasksel -y
sudo tasksel install kubuntu-desktop
reboot

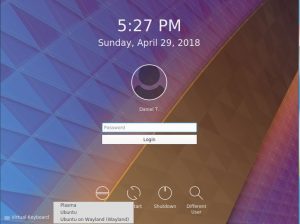
2. After rebooting, select Plasma


Links – 


Release notes – Bionic Beaver release notes

What is new – https://itsfoss.com/ubuntu-18-04-release-features/

Some of the most popular Linux youtube videos by view counts –

1. Introduction to Linux
Linux history, what an OS is, how to interact with Linux, Linux distros etc.

2. 3D Desktop! TouchScreen and XGL on Linux!

3. How Linux is Built
The code, how many lines of code the Linux kernel has, how release are made …

4. Linux Baby Rocker
Baby rocket shell script, which ejects and pulls back a CDROM drive acting as a baby rocker.

5. Introduction to Linux and Basic Linux Commands for Beginners
Tutorial on basic Linux commands, the Linux in the demo is installed in Windows running a virtual box.

You can search full list in youtube.

How to troubleshoot dns issues by directly querying name servers


This tip will help you troubleshooting DNS issues by directly querying DNS using only the IP address of name servers. When you run dns resolution client tools such as dig or nslookup, they will query the name server configured on your host. If the DNS with unexpired ttl is in cache, they will return it from cache. The results will return from cache by any of the intermediate name servers except for the authoritative name servers. That is why ‘dig +trace’ is useful in troubleshooting dns issues, as it starts from the root name servers and moves down all the way to the authoritative name servers to get you the dns records.

Here is a similar tool to “dig +trace“, which queries root name servers, their IPs is hard coded in the script, and follows the authoritative name servers for the subdomains by directly querying the registered IP addresses of name servers. For instance, if you use this tool to query “www.example.com”, it will get a randomly picked root name server’s IP and query it for NS records of “.com” domain. Once it gets the IP address of the name servers for “.com”, it goes on to query them for authoritative name servers of “example.com.” and does the same for “www.example.com.” as well. Throughout the query, it doesn’t use any cache or FQDN, it get the IP address of authoritative name servers and queries the IP directly.

You will need to install dnspython module first –

cd /tmp
pip install dnspython
https://github.com/danasmera/Python_scripts.git
cd Python_scripts/

Start DNS tracing now –

1. google.com

$ python dig-trace.py google.com
Splitting domain into sub-domains ...
['.', 'com.', 'google.com.']

Selected root . name server: 199.9.14.201
Selecting name server for com. domain ...

picked name server: 192.48.79.30
Selecting name server for google.com. domain ...

picked name server: 216.239.36.10
Querying name server: 216.239.36.10
google.com. 300 IN A 173.194.219.102
google.com. 300 IN A 173.194.219.101
google.com. 300 IN A 173.194.219.113
google.com. 300 IN A 173.194.219.100
google.com. 300 IN A 173.194.219.138
google.com. 300 IN A 173.194.219.139


2. www.whitegov.com txt

 python dig-trace.py www.whitegov.com txt
Splitting domain into sub-domains ...
['.', 'com.', 'whitegov.com.', 'www.whitegov.com.']

Selected root . name server: 192.33.4.12
Selecting name server for com. domain ...

picked name server: 192.54.112.30
Selecting name server for whitegov.com. domain ...

picked name server: 204.11.57.26
Selecting name server for www.whitegov.com. domain ...

picked name server: 204.11.56.26
Querying name server: 204.11.56.26
www.whitegov.com. 3600 IN TXT "~"


3. cnn.com mx

$ python dig-trace.py cnn.com mx
Splitting domain into sub-domains ...
['.', 'com.', 'cnn.com.']

Selected root . name server: 193.0.14.129
Selecting name server for com. domain ...

picked name server: 192.31.80.30
Selecting name server for cnn.com. domain ...

picked name server: 205.251.192.47
Querying name server: 205.251.192.47
cnn.com. 300 IN MX 10 mxa-000c6b02.gslb.pphosted.com.
cnn.com. 300 IN MX 10 mxb-000c6b02.gslb.pphosted.com.

4. linuxfreelancer.com [ANY | NS ]

$ python dig-trace.py www.linuxfreelancer.com ANY
Splitting domain into sub-domains ...
['.', 'com.', 'linuxfreelancer.com.', 'www.linuxfreelancer.com.']

Selected root . name server: 192.112.36.4
Selecting name server for com. domain ...

picked name server: 192.35.51.30
Selecting name server for linuxfreelancer.com. domain ...

picked name server: 208.109.255.48
Selecting name server for www.linuxfreelancer.com. domain ...
Querying name server: 208.109.255.48


$ python dig-trace.py www.linuxfreelancer.com NS
Splitting domain into sub-domains ...
['.', 'com.', 'linuxfreelancer.com.', 'www.linuxfreelancer.com.']

Selected root . name server: 202.12.27.33
Selecting name server for com. domain ...

picked name server: 192.55.83.30
Selecting name server for linuxfreelancer.com. domain ...

picked name server: 216.69.185.48
Selecting name server for www.linuxfreelancer.com. domain ...
Querying name server: 216.69.185.48
www.linuxfreelancer.com. 1800 IN CNAME linuxfreelancer.com.
linuxfreelancer.com. 3600 IN NS ns75.domaincontrol.com.
linuxfreelancer.com. 3600 IN NS ns76.domaincontrol.com.


Links –


https://github.com/danasmera/Python_scripts

https://github.com/rthalley/dnspython

https://linux.die.net/man/1/dig

How to update or change author name or email in git or github

Under rare circumstances, your commits in github might appear in github as if they were made by some one else. I was once the sole contributor in a personal repo and when I pushed a commit to github, I noticed that the in github the commit appeared to come from some other github member and that member was added as a contributor in my repo. The reason for this issue was in my local git config, I had my email address as “user@localhost.localdomain”. Apparently github links your commit to whoever setup that email address to their GitHub account.

Here is the steps and a script that you can run to fix this –

1. Clone your github repo to your local file system.
2. change to the cloned directory
3. Add below shell script to your repo directory and run it –
Make sure to update the first three variables OLD_EMAIL, CORRECT_NAME, and CORRECT_EMAIL to appropriate values.

#!/bin/sh

git filter-branch --env-filter '
OLD_EMAIL="ADD_EMAIL_TO_BE_REMOVED@HERE.COM"
CORRECT_NAME="NEW_CORRECT_NAME"
CORRECT_EMAIL="NEW_CORRECT_EMAIL@HERE.COM"
if [ "$GIT_COMMITTER_EMAIL" = "$OLD_EMAIL" ]
then
    export GIT_COMMITTER_NAME="$CORRECT_NAME"
    export GIT_COMMITTER_EMAIL="$CORRECT_EMAIL"
fi
if [ "$GIT_AUTHOR_EMAIL" = "$OLD_EMAIL" ]
then
    export GIT_AUTHOR_NAME="$CORRECT_NAME"
    export GIT_AUTHOR_EMAIL="$CORRECT_EMAIL"
fi
' --tag-name-filter cat -- --branches --tags

4. Run ‘git log’ to review the author information and if everything looks good –

git push --force --tags origin 'refs/heads/*'

5. delete the cloned directory from your local file system.

References –

https://help.github.com/articles/why-are-my-commits-linked-to-the-wrong-user/

https://help.github.com/articles/changing-author-info/

ten basic Linux commands

Top 10 basic Linux commands for beginners

1. id – display information about user.

id will print the user and group information of the given argument, if no argument is given, it will show the information of the currently logged in user.

$ id
uid=1000(daniel) gid=1000(daniel) groups=1000(daniel),4(adm),27(sudo)
$ id -u -n
daniel
$ id root
uid=0(root) gid=0(root) groups=0(root)
$ id sshd
uid=110(sshd) gid=65534(nogroup) groups=65534(nogroup)
 

2. ls – list files in a directory.

ls lists the contents of current directory if not arguments are given. It has probably one of the largest number of options compared to other Linux commands.

$ pwd            # our current working directory
/home/daniel/projects
$ ls             # content of current directory
demo.txt  mail  nfs  redhat  samba
$ ls -l          # long listing
total 20
-rw-rw-r-- 1 daniel daniel   21 Apr 15 01:04 demo.txt
drwxrwxr-x 2 daniel daniel 4096 Apr 15 01:04 mail
drwxrwxr-x 2 daniel daniel 4096 Apr 15 01:04 nfs
drwxrwxr-x 2 daniel daniel 4096 Apr 15 01:04 redhat
drwxrwxr-x 2 daniel daniel 4096 Apr 15 01:04 samba
$ ls -1         # list one file per line
demo.txt
mail
nfs
redhat
samba
$ ls -a        # show all, including ones starting with . (dot)
.  ..  demo.txt  .hidden  mail  nfs  redhat  samba
$ ls -al       # long listen plus show all 
total 32
drwxrwxr-x  6 daniel daniel 4096 Apr 15 01:04 .
drwxr-xr-x 18 daniel daniel 4096 Apr 15 01:06 ..
-rw-rw-r--  1 daniel daniel   21 Apr 15 01:04 demo.txt
-rw-rw-r--  1 daniel daniel   32 Apr 15 01:03 .hidden
drwxrwxr-x  2 daniel daniel 4096 Apr 15 01:04 mail
drwxrwxr-x  2 daniel daniel 4096 Apr 15 01:04 nfs
drwxrwxr-x  2 daniel daniel 4096 Apr 15 01:04 redhat
drwxrwxr-x  2 daniel daniel 4096 Apr 15 01:04 samba
#  ls --format=verbose    # same as ls -l
total 20
-rw-rw-r-- 1 daniel daniel   21 Apr 15 01:04 demo.txt
drwxrwxr-x 2 daniel daniel 4096 Apr 15 01:04 mail
drwxrwxr-x 2 daniel daniel 4096 Apr 15 01:04 nfs
drwxrwxr-x 2 daniel daniel 4096 Apr 15 01:04 redhat
drwxrwxr-x 2 daniel daniel 4096 Apr 15 01:04 samba
$ ls -F                  # classify: / for directory, * for executable, @ for symbolic link
demo-link@  demo.txt  mail/  nfs/  redhat/  run.sh*  samba/

$ ls -ls /etc/h*         # sort by size, smallest first for all files starting with h in /etc/ directory
8 -rw-r--r-- 1 root root 4781 Mar 17  2016 /etc/hdparm.conf
4 -rw-r--r-- 1 root root   92 Oct 22  2015 /etc/host.conf
4 -rw-r--r-- 1 root root   12 Feb 18 01:21 /etc/hostname
4 -rw-r--r-- 1 root root  191 Feb 18 01:21 /etc/hosts
4 -rw-r--r-- 1 root root  411 Feb 18 01:29 /etc/hosts.allow
4 -rw-r--r-- 1 root root  711 Feb 18 01:29 /etc/hosts.deny
                                   

3. cat – concatenate files and print on the standard output.

cat conCATenates one or more files given as argument and prints those on the standard output (console).
If no file or ‘-‘ (dash) is given, it reads from standard input until EOF (Ctrl+D) is pressed and prints is to standard output.

$ ls -l linus         # ls to make sure file exists
-rw-rw-r-- 1 daniel daniel 403 Apr 15 01:20 linus

$ cat linus           # print content of file to stdout
Hello everybody out there using minix -

I'm doing a (free) operating system (just a hobby, won't be big and professional like gnu) for 386(486) AT clones.
This has been brewing since april, and is starting to get ready.
I'd like any feedback on things people like/dislike in minix,
as my OS resembles it somewhat (same physical layout of the file-system (due to practical reasons) among other things).

$ cat -n linus       # show line numbers with -n
     1	Hello everybody out there using minix -
     2	
     3	I'm doing a (free) operating system (just a hobby, won't be big and professional like gnu) for 386(486) AT clones.
     4	This has been brewing since april, and is starting to get ready.
     5	I'd like any feedback on things people like/dislike in minix,
     6	as my OS resembles it somewhat (same physical layout of the file-system (due to practical reasons) among other things).

$ cat          # read from stdin(keyboard) and print to stdout(screen), repeats after me until I press Ctr+D to end it.
reading
reading
from standard inpu
from standard inpu
pressing Ctr+D now
pressing Ctr+D now

$ cat << EOF > file-from-stdin       # Reads from keyboard until EOF is pressed and saves(redirects) the text to a file.
  I read this from stdin
  end of file
  EOF

$ ls -l file-from-stdin               # printing content of file we created above.
-rw-rw-r-- 1 daniel daniel 35 Apr 15 01:22 file-from-stdin

$ cat file-from-stdin 
I read this from stdin
end of file

4. clear – clears the terminal screen.

clear is self-explanatory, it clears the terminal display and places your cursor at the top left corner. Similar to “cls” command in DOS/Windows/PowerShell.

$ clear

5. rm – removes one or more files.

 ls           # list of files/dirs in current directory
demo-link  demo.txt  file-from-stdin  linus  mail  myfile  nfs  redhat  run.sh  samba

$ ls myfile    # file exists
myfile

$ rm myfile      # delete file

$ ls myfile      # we should get an error
ls: cannot access 'myfile': No such file or directory

$ rm -i linus    # prompt for confirmation before removing file
rm: remove regular file 'linus'? y

$ rm -v demo.txt   # add verbosity, explain what is being done.
removed 'demo.txt'

$ rm -d mail -v     # remove empty directory
removed directory 'mail'

$ rm redhat/         # try to delete directory with rm, should get an error
rm: cannot remove 'redhat/': Is a directory

$ rm -d redhat        # error again, not empty
rm: cannot remove 'redhat': Directory not empty

$ rm -r redhat/ -v     # use -r for recursive removal of directory and its contents.
removed 'redhat/version7'
removed 'redhat/version6'
removed directory 'redhat/'

Use rmdir to delete the named directory, not its contents. To completely wipe out a directory and its contents use ‘rm -r’.

6. mkdir – make or create one or more directories.

mkdir is used to create one or more directories under current directory if no directory argument is given. The user creating the directory must have the permission to create a directory under the specified directory.

$ whoami                  # regular user
daniel

$ mkdir /root/mydir       # trying to create directory under root user's home directory, should get permission error.
mkdir: cannot create directory ‘/root/mydir’: Permission denied

$ pwd                      # current working directory, my home directory
/home/daniel/projects

$ mkdir april-15           # create directory here
$ ls
april-15  demo-link  file-from-stdin  nfs  run.sh

$ mkdir nfs -v             # can't overwrite an existing directory
mkdir: cannot create directory ‘nfs’: File exists
$ mkdir newdir/seconddir/thriddir    # can't create a series of directories without parent directories existing
mkdir: cannot create directory ‘newdir/seconddir/thriddir’: No such file or directory

$ mkdir -p newdir/seconddir/thriddir  # -p makes parent directories as well, solves above problem.

$ ls -R newdir/                       # recursive (-R) listing with ls shows all directories created.
newdir/:
seconddir

newdir/seconddir:
thriddir

newdir/seconddir/thriddir:

7. mv – moves a file or directory to another location.

mv is most commonly used for renaming files and directories. You can specify more than two directory arguments,
it will move the all directory, except the last one to the last (destination) directory.

$ mv -v run.sh run-script.sh   # -v is for verbose, move file.
'run.sh' -> 'run-script.sh'

$ ls run*                      # file has been renamed.
run-script.sh

$ mv samba/ nfs/ redhat/ -v          # move first two directories to the last one
'samba/' -> 'redhat/samba'
'nfs/' -> 'redhat/nfs'

$ ls redhat/
nfs  samba      

8. cp – copy files and directories.

cp is used to copy files as well as directories, most commonly to take backups.

$ ls
april-15  demo  demo-link  demo.txt  file-from-stdin  hosts-backup  linus  mail  myfile  newdir  redhat  run-script.sh

$ cp demo demo-new -v    # copying directory
cp: omitting directory 'demo'

$ cp -r demo demo-new -v    # recursive(-r) copy, with verbose(-v) mode.
'demo' -> 'demo-new/demo'
'demo/one' -> 'demo-new/demo/one'

$ cp -av redhat /tmp/      # archive, preserve the specified attributes
'redhat' -> '/tmp/redhat'
'redhat/nfs' -> '/tmp/redhat/nfs'
'redhat/samba' -> '/tmp/redhat/samba'
'redhat/newdir' -> '/tmp/redhat/newdir'
'redhat/newdir/seconddir' -> '/tmp/redhat/newdir/seconddir'
'redhat/newdir/seconddir/thriddir' -> '/tmp/redhat/newdir/seconddir/thriddir'

$ls -al /tmp/redhat/
total 20
drwxrwxr-x  5 daniel daniel 4096 Apr 15 01:55 .
drwxrwxrwt 13 root   root   4096 Apr 15 01:58 ..
drwxrwxr-x  3 daniel daniel 4096 Apr 15 01:55 newdir
drwxrwxr-x  2 daniel daniel 4096 Apr 15 01:04 nfs
drwxrwxr-x  2 daniel daniel 4096 Apr 15 01:51 samba

$ touch demo/one mail/one

$ cp demo/one mail/one        # overwrite file

$ cp -i demo/one mail/one     # prompt before overwriting a file
cp: overwrite 'mail/one'? y

$ cp -s demo-link  demo-link2  # copy as symbolic link

$ ls -l
...
lrwxrwxrwx  1 daniel daniel    8 Apr 15 01:51 demo-link -> demo.txt
lrwxrwxrwx  1 daniel daniel    9 Apr 15 02:02 demo-link2 -> demo-link
drwxrwxr-x  2 daniel daniel 4096 Apr 15 01:58 demo-new
...
$ cp demo-link demo-link3     # copies target or dereferenced file, not symbolic link.

$ ls -l
...
drwxrwxr-x  2 daniel daniel 4096 Apr 15 02:00 demo
lrwxrwxrwx  1 daniel daniel    8 Apr 15 01:51 demo-link -> demo.txt
lrwxrwxrwx  1 daniel daniel    9 Apr 15 02:02 demo-link2 -> demo-link
-rw-rw-r--  1 daniel daniel   21 Apr 15 02:02 demo-link3
drwxrwxr-x  2 daniel daniel 4096 Apr 15 01:58 demo-new
-rw-rw-r--  1 daniel daniel   21 Apr 15 01:51 demo.txt
...

9. cd – change directory.

cd is actually a built-in shell command, you won’t find it in the file system as the other commands above. It is used to change working directory.
Use it with “pwd” to show your current directory.


$ pwd        # our current working directory
/home/daniel/projects
$ cd demo    # changing to demo/ directory
$ pwd
/home/daniel/projects/demo
$ cd -       # switch back to previous directory, "-" (dash) does the trick.
/home/daniel/projects
$ pwd
/home/daniel/projects
$ cd /root/   # you need permission to switch to protected directories.
-bash: cd: /root/: Permission denied

10. man – display information from the man pages.

The man command provides and interface to the on-line reference manuals. man will search through all the sections of the man pages.
If the section number is given, it will search only that section.

$ man man       # search the man  pages for information about the man command.

$ man ls          # help on ls

$ man 5 crontab   # search in section 5 of the man pages

$ man -k mkdir    # show short description of mkdir keyword.
mkdir (1)            - make directories
mkdir (2)            - create a directory
mkdirat (2)          - create a directory
How to get your first online freelancing assignment

Getting your first online freelancing assignment is not that easy. In general, there is lots of competition but most of all the established professional on the particular online platform will take most of the bids. That makes it really difficult for new sign ups to win any of the bids as they haven’t built any reputation within that platform. Online freelancing platforms such as Upwork, allow the freelancers or contractors to create a profile – more like an online resume – plus all the feedback and ratings they have received from the employers on the particular platform. So when a new assigned is posted, the employers will in nearly all cases look for someone who has been rated well and that doesn’t give new comers any chance.

Here are some of the tips you can use to improve your chances of getting your first bid, as that is really crucial whether you will make it in a particular freelancing platform or not. If you have a presence in several freelancing sites, your ratings and feedback don’t get transferred to other sites, which means you have to start from scratch to prove your worth.

Let us get to the tips –

1. Be patient, be patient, be patient – it takes time, landing your first assignment is tough but once you get it and your employers leaves you a good feedback with a high rating, upcoming bids become a lot easier. This could take weeks or even months for some folks.

2. Do not overcharge – In fact, I would say set your rate way below the average for your particular area of work. Look at the other bidders, and make sure you get noticed for your much lower fees. Remember, at this point your highest priority is not money, it is the feedback and rating. You will have plenty of time to hike your fees later 🙂

3. Read the job description carefully – Since most of the bids get lots of bidders, the way the employers try to narrow down the candidates is by picking the ones who follow the instructions. The employer will put some information in the job description, such as respond with “the text XYZ” at the top of your response email. Anyone who doesn’t follow the instruction will not get a chance. Besides, reading the job description carefully will help you figure out whether this task is the right one for you or not.

4. Bid to an assignment that you know you will accomplish it really well – remember this is your first task, pick it carefully. You have to be confident that you can accomplish this task really well and get a good feedback. You will pick and choose later, don’t be picky now.

5. Create a stellar profile – as a newbie freelancer for this particular freelancing site, most potential employers won’t look at your profile, they filter out candidates based on how long they have been on the site, how many ratings they have, total number of assignments they worked on etc. But if for some reason an employer decides to give you a chance, you better make sure they find all the information they need in your profile.

6. Respond fast to emails/text from potential employers – show them that you won’t vanish when an urgent assignment comes in! Most of the employers have to report to someone too, and they will ask for your progress status etc. Make sure that they can reach out to you in a predictable manner. Let them know your working hours, and how long it might take you to respond and the communication channel that they can reach you, whether it is through messaging service provided by the freelancing site, skype, gmail etc.

7. Don’t burn bridges – it is a small world, make sure you leave on good terms.

8. Research the employers – There are good and bad employers in the online freelancing world, make sure to research the employers as well. Look at their profile in the platform, check how other candidates rated them. Especially pay attention to how many jobs they posted and how many hires they actually made, this ratio is very important.

9. Don’t sound needy or desperate – I know you really want to get your first assignment, and I am sure you will get it with enough perseverance. But don’t be too needy in your communication with potential employers. Be confident and use language which shows that you are familiar with the task and that you will deliver.

10. Watch out for impostors – some will try to get answers without signing a contract, some might try to blackmail you knowing that this is your first assignment and how desperate you are to get a good feedback and rating from them. So make sure to research the employers as well.

I hope this list of tips helps, Good luck with winning your first bid!

List of some freelancing sites –

https://dynomapper.com/blog/266-top-25-freelance-websites-to-find-work-in-2018

Other relevant tips –

https://lifehacker.com/5460247/top-10-tips-and-tools-for-freelancers